

Tuesday, November 6, 2012

Homemade Pizza: Deep Dish (Pizza Hut copycat)

Next up in the homemade pizza is a recipe for deep dish pizza. I've been making this pizza for several years and found it originally from The Frugal Girl. The first few times were a little tedious because there are several steps to get this pizza on the table. This is also the perfect recipe for cold nights because you need really hot oven, which warms everything nicely since the sun is going down so early!

This recipe makes two 9-inch deep dish pizzas baked in cake pans! The secret ingredient is potatoes and I've also made them with a cup of white whole wheat flour subbed in for all-purpose. It makes a beautifully dense crust and browns up really well.

Deep Dish Pizza (via The Frugal Girl)
1 medium baking potato (about 9 ounces), peeled and quartered
1 1/2 t. active dry yeast
3 1/2 cups all-purpose flour
1 cup warm water
2 T. vegetable oil, plus 2 additional for each pan
1 3/4 t. table salt

Cook the potato, allow to cool, then grate, measuring 1 cup (lightly packed). You can also cook a large batch of potatoes and freeze them to use in this recipe! 

In your mixing bowl, add 3 cups of flour, yeast, and salt. While mixer is running, add water and 2 T. oil and mix for one minute. Then add the potato, mixing for an additional 2-3 minutes. Add in remaining flour slowly. You don't have to use it all, just until the dough is no longer very sticky. 

Turn dough out on to a lightly floured surface and kneed until the dough is smooth but still springy (usually only a minute or so for me). Return the dough to the mixing bowl, covered with a wet towel, and allow to rise for about an hour.

After the dough has risen, punch it down and place on a lightly floured surface. Divide in two and roll each into about a 9-inch round. Place dough into oiled pans (2 T. of oil per pan). You can manipulate the dough some to push it up the sides of the pans (see photo). Let rest for about 30 minutes. Fifteen minutes into this time I set my oven at 425 to preheat with the pizza stone inside.

Using a fork, prick all over the dough to allow the air to escape. I go right up to the edge which helps make a more defined and puffy crust. Put the pans in the oven on the pizza stone and bake for about 10 minutes.

Remove the pans with the semi-baked crusts from the oven and add sauce and toppings. These pizzas can handle a good bit of sauce since the crust is so substantial. Bake for an additional 10 minutes, until brown and crispy. I use a plastic knife to loosen each pizza so that it slides right out onto the cutting board for easy slicing.
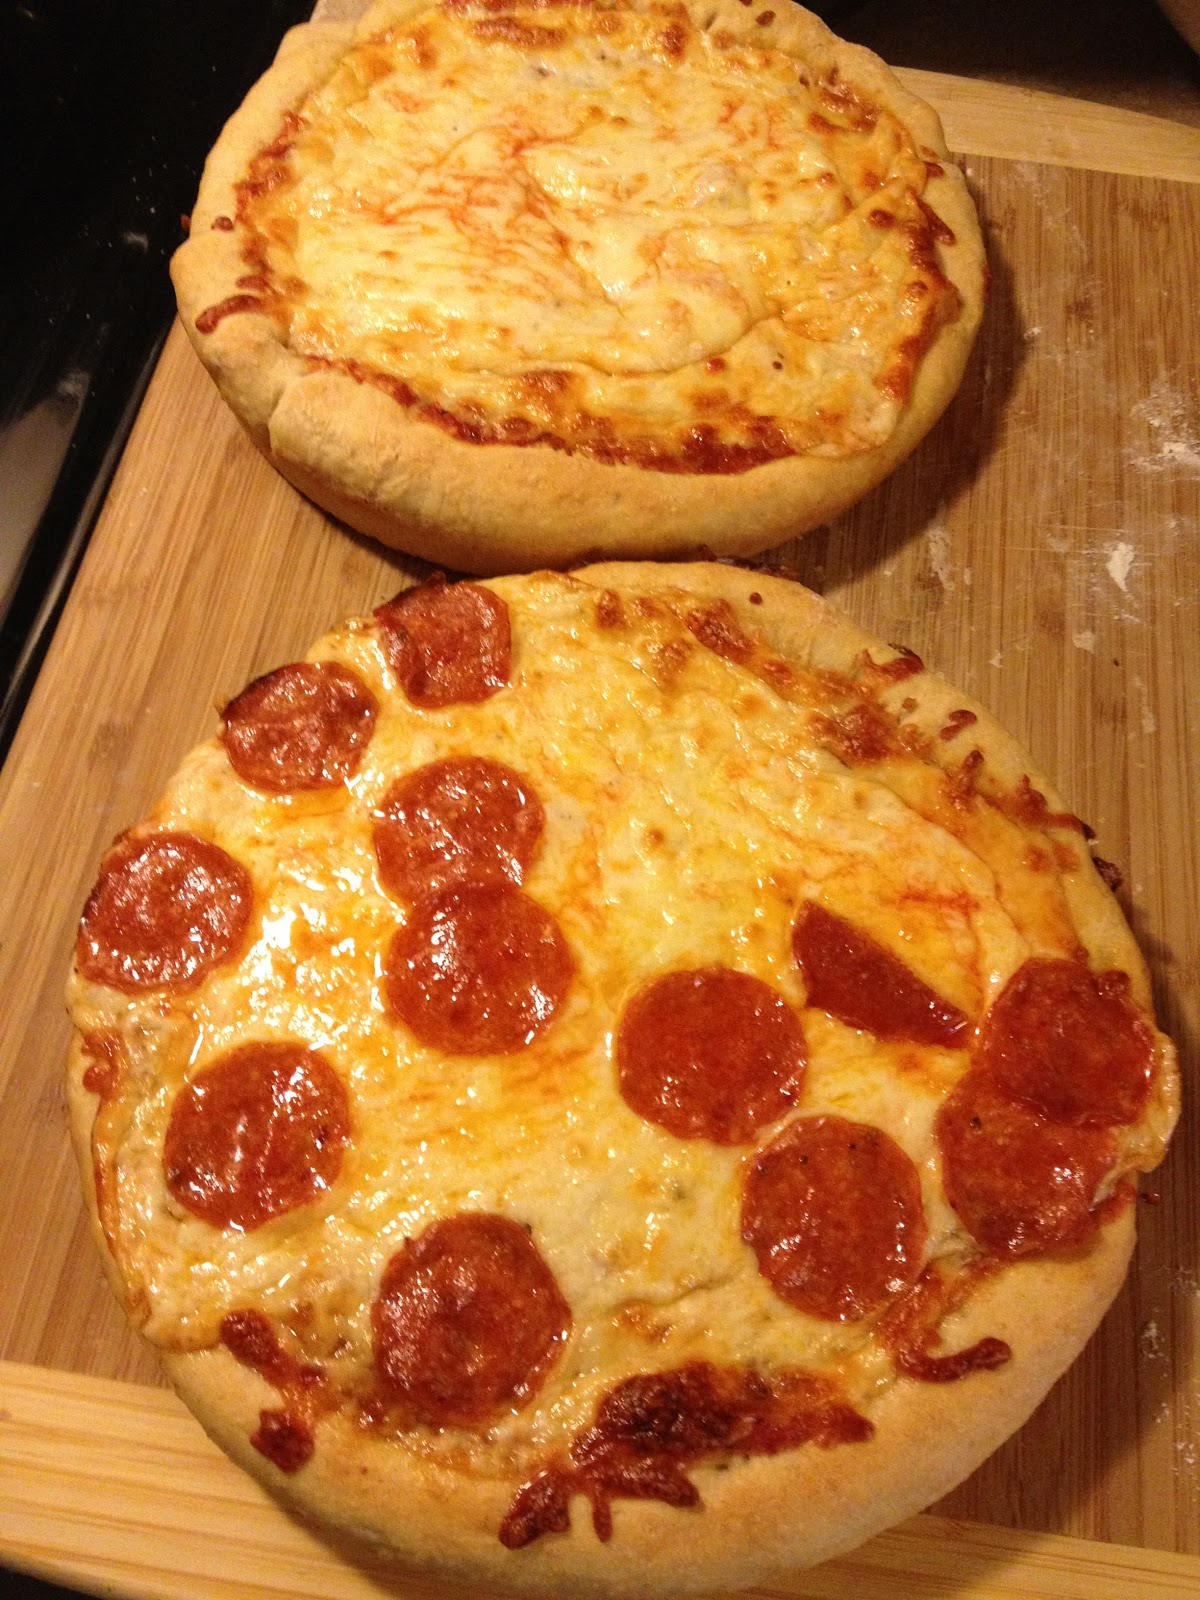
This is one of our favorite pizza recipes! Enjoy!

Wednesday, October 31, 2012

Hurricane Activities

We ended up getting tons of rain and wind from hurricane Sandy, but thankful no damage to our home and no loss of electricity. So many people were not spared from the damage, and we just very thankful.

Our hurricane prep included lots of cooking, starting with the 25lb+ bag of apples!

I made about 2 gallons of applesauce in my crockpot and dutch oven! I made sure to make way more than last year because it was gone so quickly.

I also made up this homemade pumpkin spice latte mix, using the recipe on A Farmgirl Dabbles. They turned out really nice, although by the last day the spice flavor was a little too strong for me. My husband still liked it, but I'm more of the coffee snob between the two of us :)

My kids were SO excited to help make these fall leaf sugar cookie cut outs. I saw the idea on Home Cook'N Newsletter and knew I had to try it. You can buy the Wilton leaves and acorns cookie cutters from Amazon or a craft store like Michael's or JoAnns. I divided my dough into 4 and colored each orange, green, red, or brown (cocoa powder). The red turned pink when it baked, but otherwise these were fabulous!

For indoor activities, we put this big roll of paper to good use! (Thanks Aunt Sue!) Each child had their own sheet taped to the floor in the kitchen and they went to town with stickers, crayons, and more stickers.

This was such a blast that I know we'll be pulling it out again soon. AND, since they were occupied in the kitchen, it made my cooking much easier.

I also taped the paper into a rectangle in our foyer and drew a quick little road on it for the matchbox cars.

This became our new coloring spot also, and we added trees, grass, lakes, flowers, forests, and people! My kids loved looking through The Berenstain Bears and the Big Road Race to find other things that would be along the road for us to color!

We also enjoyed homemade peppermint marshmallows with our hot chocolate the morning after the storm. I use this recipe from Joy of Baking, and just subbed out peppermint extract for the vanilla. I've also made these by dipping in cocoa powder to make chocolate marshmallows. They are amazing, you really should try one!

Our big "burn off some energy" activity was racing! We used our large letter mat to make a "track" for each child. Then each race they had a different relay. They loved racing each other, running like crazy in the house, and the different activities kept things interesting and engaging. We took time in between races for drinks and to give them time to catch their breath too!
Some races they had to transfer a small item (a toy animal, something small) by carrying in a cup and then pouring into another cup at the end.
They crawled with matchbox cars for a race...
We also worked on fine motor skills: carrying a block and stacking it higher each time.
And carrying a piece of a puzzle each time and having to find the correct spot.

I hope you weathered the storm ok and enjoy trying out some of these indoor activities over the winter months!

Thursday, October 25, 2012

Giveaway Winners

Congratulations to the giveaway winners (Heather Jo, guitargirl, Sharon, Blair, and kguikema)! You have been email and your ebook should be on its way shortly! 

Thanks to everyone who entered, and remember that you can purchase 21 Days to a More Disciplined Life for just $0.99 today only, tomorrow the price will go up to $4.99.

I'll be back later today with another post in my book series :)

Wednesday, October 24, 2012

Roasted Butternut Squash and Cauliflower Soup

Make sure to enter the 21 Days to a More Disciplined Life giveaway from Money Saving Mom. It ends today!!

Last week was our final CSA pick-up for the season, so I had some autumn veggies to use up (and I don't usually like cauliflower!). I took a little bit of inspiration from this recipe by Soup Addict, but I'm happy to report that my many edits turned out excellent!

So, here it is, my Roasted Butternut Squash and Cauliflower soup (with a few secret ingredients) :)
The Recipe:
1 medium size butternut squash, peeled and cubed
1/2 large cauliflower head, or one medium, cut into florets
olive oil
salt and pepper
onion
garlic
2 quarts chicken stock
1/2 cup-1 cup apple cider
3 or 4 slices good quality sandwich bread, crusts removed and cubed
blender (immersion or counter)
optional bread and feta cheese for toppings

Preheat oven to 400. Fill a large baking sheet with the cut up squash and cauliflower. Drizzle with olive oil and sprinkle with salt and pepper. Bake for 30 minutes, flip and test, bake for an additional 20-30 minutes.

While the veggies are roasting, saute onion and garlic in a large stock pot. Add chicken stock and apple cider. Transfer cooked veggies to stock pot and let simmer for 10-30 minutes (however much time you have!).
Add cubed bread and allow to soak into the broth. Then use an immersion blender (or work in batches in a counter blender) to puree as finely as desired. This creates a dense, textured, and uniform soup that is hearty and tastes like autumn!

Serve topped with additional cubes of bread and feta cheese, if desired. I loved how rich and thick this turned out. The squash and cauliflower flavors melded together perfectly, and the hint of apple cider was really nice. I'm totally not a cauliflower person and my husband doesn't usually do squash, but we thought this was amazing. Enjoy!


Tuesday, October 23, 2012

21 Days to a More Disciplined Life Giveaway


Money Saving Mom, written by Crystal Paine, is one of my favorite blogs. I love getting the scoop on freebies and high value coupons, but I most appreciate how she writes about setting goals, prioritizing, and making a frugal lifestyle fit your family's needs. 


I reviewed Crystal's book The Money Saving Mom's Budget last year. Crystal just released a brand-new ebook today called 21 Days to a More Disciplined Life. I have skimmed through a bit of this book, but have not yet gotten the chance to really dig into it. It's a easy read, like all that Crystal writes, and she makes you feel like she is coming along side you, the way a good coach does. She is encouraging and challenging at the same time.  


This ebook is available on Kindle (and you don't need a Kindle to read Kindle books; you can download Kindle for your computer!), and is also available in PDF format. Through October 26 you can buy 21 Days to a More Disciplined Life for just $0.99! After that the price will go up to $4.99. But, if you are willing to spend the $1 right now, here's your chance to win a copy of this fantastic ebook.


Win It!


I have 5 copies of 21 Days to a More Disciplined Life ebook to give away! To enter, all you need to do is leave a comment (it can just be 'enter me!') on this post. Be sure to include your email address so I can contact you if you win. The giveaway will end tomorrow (Oct. 24) at 9 PM Eastern.


Disclosure: I was given a free copy for myself and 5 copies to give away. All opinions are my own.

Friday, October 12, 2012

In my house this week...

I haven't been getting nearly enough sleep between staying up late for Orioles games and my kiddos not sleeping well in their newly shared room. But we are VERY excited to have something to cheer about in October as Baltimore baseball fans.


And for the most part the kids have loved sleeping in the same room.


We are also gearing up for a birthday party on Saturday as Will turns two.


I'm planning to make this funfetti cake from bakedbree.com.


And I'm using one of Will's favorite books for the decorating inspiration.


I woke up with no voice this morning and am feeling quite a bit under the weather. Parenting without a voice always makes for a challenge. But I'm resting up for tomorrow, enjoying watching a little extra movies with the kids (they love The Sound of Music), an plenty of audiobooks to save my voice.
Here's hoping for an Orioles win tonight and a lovely fall weekend to you all!

Wednesday, October 10, 2012

Homemade Pizza: The Basic Recipe

We have a weekly pizza night at our house. Not only does everyone love pizza, it makes my meal planning a lot simpler to just eat it the same night each week.  Plus, pizza is one of those easy to order out meals, so making it at home helps us to avoid ordering pizza on a lazy day. 

It's so much cheaper to make myself, and while I won't pretend that I love when we do order out, I've gotten pretty good at making a decent pizza at home. Over the next several weeks I plan to share some of the different pizza recipes that I use. I get board of the same kind of homemade pizza each week very quickly. If we have the same kind too frequently I am much more likely to want to order out! So I rotate about 5 or 6 different pizza crusts and various toppings, although do cheese and pepperoni about every other week.


My basic pizza dough recipe comes from the Better Homes and Gardens New Cook Book Bridal Edition cookbook, one that I got when we were first married. I like this one because it doesn't need any rise time, so it's perfect for last minute nights. 


My Kitchen Aid mixer is a lifesaver with all the pizza dough I make!

And since this dough is really simple, I usually brush the whole thing with olive oil before I add the sauce and toppings. Then I sprinkle some garlic salt or other seasoning on the crust to add just a bit more life to it!


Pizza Dough
from Better Homes and Gardens

2 3/4 to 3 1/4 cups all-purpose flour
2 1/4 teasp. yeast
1/4 teasp. salt
1 cup warm water
2 Tbsp. cooking oil

Beat 1 1/4 c. flour, yeast, salt, water and oil in a mixer for 30 seconds on low. Turn up to high and beat for 3 minutes. Gradually add as much remaining flour as possible while still maintaining a soft, pliable dough.

Turn dough out on to a lightly floured surface and knead in enough flour so the dough is no longer sticky. I only knead for a minute, max. Let the dough rest for about 10 minutes, while the oven is preheating to 450 degrees. Make sure to place any stoneware in the oven while it is still cold.

Once the oven is heated, shape the dough into your desired shape using a rolling pin or hands. (Our pizzas are hardly ever perfectly round, and often end up rectangular :) they still taste great!). Make one large pizza or two slightly smaller and thinner crusts with this amount of dough. Place on pizza stone.

If desired, brush dough with olive oil and sprinkle with garlic/garlic salt. Top with homemade sauce and favorite cheese, plus pepperoni or other favorite toppings. Bake in 450 degree oven for about 13 minutes, or until cheese is browned. Allow to rest for 5 minutes before cutting to allow the toppings to set. Enjoy!
Related Posts with Thumbnails